Reklami
Related Articles

Photography is a medium that has the ability to capture moments, evoke emotions, and tell stories through visual imagery. In order to fully harness the power of photography, it is crucial for photographers to have a solid understanding of various technical aspects. One such aspect is aperture, which plays a vital role in determining the depth of field and overall exposure of an image. This article aims to provide a comprehensive guide on Aperture in Photography, exploring its definition, functionality, and practical applications.
Consider a hypothetical scenario where a photographer wants to take a portrait photograph against a stunning natural backdrop. The subject stands tall amidst vibrant flowers while distant mountains peak out from behind them. To ensure that both the subject and the scenic beauty are captured in focus with optimal lighting, the photographer must make careful use of aperture settings. Understanding how different apertures affect depth of field will enable the photographer to create desired effects – whether they want to isolate their subject by using a wide-open aperture or capture more details by using a smaller one.
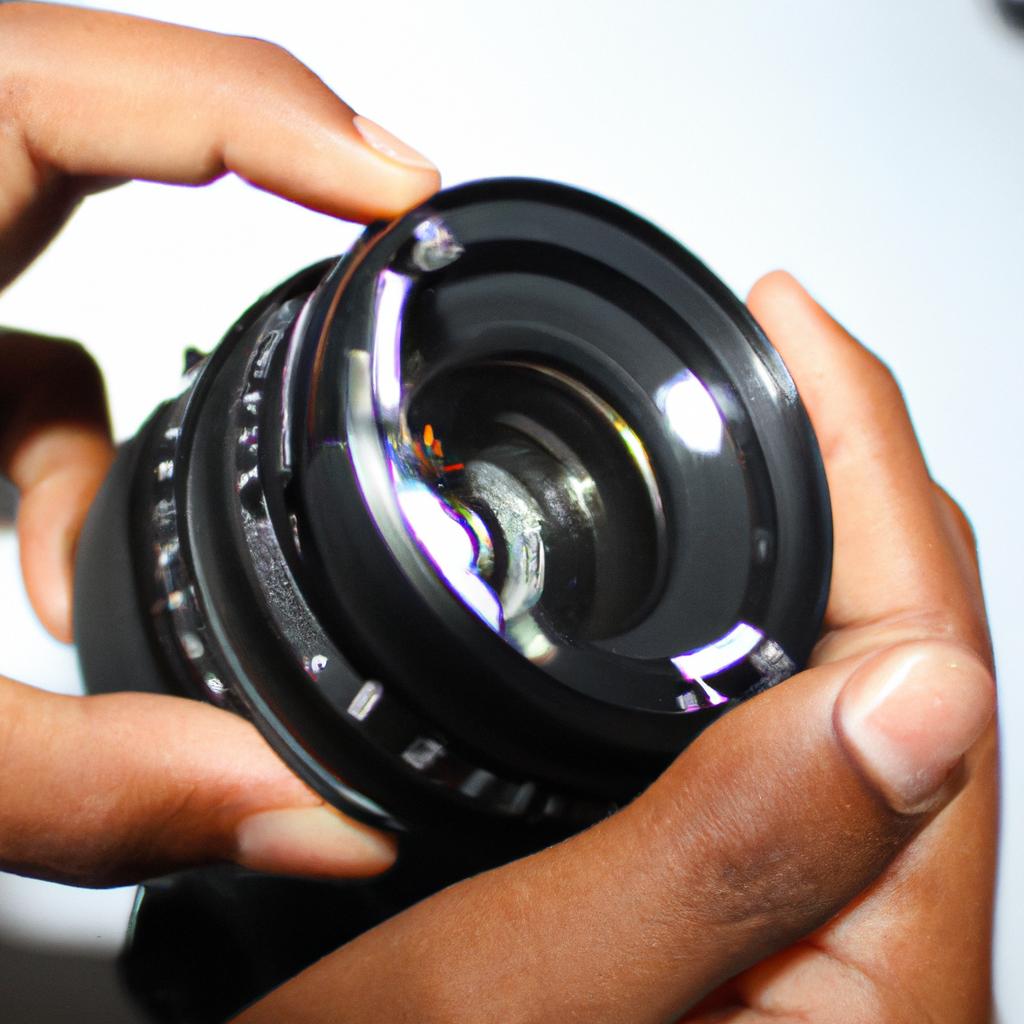
Aperture refers to the opening in a camera lens that allows light to pass through onto the camera sensor or film. It is measured in f-stops and determines two key factors: depth of field and exposure. Depth of field refers to the range within which objects in an image appear sharp and in focus. A wide aperture, represented by a lower f-stop number (e.g., f/1.8), creates a shallow depth of field where only the subject is in focus while the background appears blurred or out of focus. This technique is often used in portrait photography to draw attention to the subject by separating them from the surroundings.
On the other hand, a narrow aperture, represented by a higher f-stop number (e.g., f/16), creates a deep depth of field where both the subject and the background are in focus. This is commonly seen in landscape photography where photographers aim to capture all elements of a scene with clarity.
In addition to affecting depth of field, aperture also impacts exposure. The wider the aperture (lower f-stop number), the more light enters the camera, resulting in a brighter image. Conversely, using a narrower aperture (higher f-stop number) restricts the amount of light entering the camera, leading to a darker image. It’s important for photographers to balance their desired depth of field with proper exposure settings to achieve their intended aesthetic.
Practical applications of understanding aperture extend beyond portraits and landscapes. For example, sports photographers may use wider apertures to freeze fast-moving action while blurring out distracting backgrounds. In macro photography, where subjects are extremely close-up, using smaller apertures can increase depth of field and ensure sharpness throughout intricate details.
To control aperture settings on most cameras, photographers can either use manual mode or aperture priority mode (often denoted as “A” or “Av” on camera dials). Manual mode provides full control over all camera settings including shutter speed and ISO alongside aperture, while aperture priority mode allows photographers to select their desired f-stop and lets the camera automatically adjust other settings for optimal exposure.
Understanding how different apertures affect depth of field and exposure empowers photographers to make intentional choices that enhance their visual storytelling. Experimenting with various aperture settings and observing the resulting effects will enable photographers to unleash the full creative potential of their images.
Understanding the concept of depth of field
Understanding the Concept of Depth of Field
To truly grasp the concept of depth of field in photography, let us consider a hypothetical scenario. Imagine capturing an image of a blooming flower against a blurred background. The sharpness and clarity of the flower, while the surroundings fade into softness, create an aesthetically pleasing effect that draws attention to the subject. This visual phenomenon is achieved through careful manipulation of aperture settings.
Aperture refers to the adjustable opening within a camera lens that controls how much light enters the camera. It is measured in f-stops, with lower numbers indicating larger openings and higher numbers representing smaller ones. In terms of depth of field, adjusting the aperture allows photographers to determine how much of their image will be in focus. By widening the aperture (using a lower f-stop), one can achieve shallow depth of field, where only a small portion appears sharp while everything else becomes progressively softer.
Understanding depth of field has several practical implications for photographers:
-
Creative Expression: Manipulating depth of field enables artists to convey emotions or emphasize specific elements within their images. For instance, by blurring out distracting backgrounds using a wide aperture, photographers can direct viewers’ attention towards important subjects or details.
-
Visual Hierarchy: Controlling depth of field helps establish hierarchy within photographs by emphasizing certain objects over others. By selectively focusing on specific areas and leaving other parts deliberately blurred, photographers shape viewers’ perception and guide them towards desired focal points.
-
Environmental Context: Depth of field choices also play a crucial role in capturing environmental context. Adjusting apertures allows photographers to showcase both foreground elements and distant scenes simultaneously or isolate subjects from busy surroundings.
-
Narrative Impact: Lastly, manipulating depth of field can significantly impact storytelling aspects within photographs. A photographer might choose to use shallow depth of field to evoke mystery or intrigue by obscuring details surrounding their subject matter or opt for deep focus to provide rich contextual information about their scene.
To better understand the relationship between aperture, shutter speed, and ISO, which collectively contribute to achieving desired depth of field effects, let us explore the next section.
The relationship between aperture, shutter speed, and ISO
Understanding the concept of depth of field provides photographers with a versatile tool to create impactful images. By manipulating aperture settings, one can control how much of a photograph is in focus, leading to creative possibilities and storytelling opportunities. For instance, imagine capturing a portrait where the subject’s face is sharply focused while the background gently blurs into an ethereal haze. This deliberate manipulation of depth of field helps draw attention to the subject and creates a sense of intimacy.
To better comprehend the relationship between aperture, shutter speed, and ISO—commonly referred to as the exposure triangle—it is essential to explore each element individually. Aperture refers to the size of the lens opening through which light enters the camera. It is measured in f-stops, such as f/2.8 or f/16, with lower numbers indicating larger openings and shallower depths of field. Shutter speed determines how long the camera’s sensor is exposed to light; faster speeds freeze motion but allow less light in, while slower speeds capture more light but may result in blur if not stabilized properly. Lastly, ISO measures the sensitivity of your camera’s image sensor: higher ISO values work well in low-light scenarios but tend to introduce noise or graininess into photographs.
To summarize:
- Aperture controls depth of field by adjusting how much of a photo appears sharp.
- Shutter speed determines whether moving subjects are frozen or blurred.
- ISO affects image quality by balancing sensitivity against potential noise.
These three elements operate together within photography’s exposure triangle—a fundamental concept that deserves further exploration.
| Aperture | Shutter Speed | ISO |
|---|---|---|
| F/1.4 | 1/1000 | 400 |
| F/5.6 | 1/250 | 800 |
| F/11 | 1/60 | 1600 |
| F/16 | 1/30 | 3200 |
In this table, we can see different combinations of aperture, shutter speed, and ISO settings. Notice how adjusting one element necessitates changes to the others to maintain a proper exposure. Understanding these relationships empowers photographers to make deliberate creative decisions based on their intended visual outcome.
Transitioning into our next section about “How to control exposure using the exposure triangle,” let us explore practical techniques for utilizing aperture, shutter speed, and ISO together effectively. By mastering this fundamental concept, you will gain greater control over your photographs’ overall exposure and image quality.
How to control exposure using the exposure triangle
Building on the understanding of the relationship between aperture, shutter speed, and ISO, we can now explore how photographers can control exposure using the exposure triangle. To illustrate this concept, let’s consider a hypothetical scenario where a photographer wants to capture an image of a vibrant sunset.
Controlling Exposure Using the Exposure Triangle
To achieve the desired outcome in our example scenario, photographers need to carefully balance three key elements – aperture, shutter speed, and ISO. By adjusting these settings, they can manipulate the amount of light entering their camera and create stunning images.
-
Aperture:
- The size of the lens opening determines how much light passes through.
- A wider aperture (smaller f-stop number) allows more light to enter but reduces depth of field.
- Conversely, a narrower aperture (larger f-stop number) restricts light while increasing depth of field.
-
Shutter Speed:
- This setting controls the duration for which your camera’s sensor is exposed to light.
- Faster shutter speeds freeze motion but allow less light into the camera.
- Slower shutter speeds capture movement but increase the risk of blurred images without appropriate stabilization techniques.
-
ISO:
- ISO measures your camera’s sensitivity to light; higher values amplify sensitivity.
- Lower ISO settings are suitable for well-lit scenes with ample natural or artificial lighting.
- Higher ISO values may be necessary for low-light situations but can introduce noise or graininess into photographs.
By effectively balancing these three factors according to different shooting conditions, photographers gain greater control over exposures and enhance their ability to convey visual narratives.
Understanding how each component affects exposure paves the way for comprehending the role of f-stop in determining the amount of light entering the camera.
The role of f-stop in determining the amount of light entering the camera
Imagine you are capturing a portrait photograph. You want to create a beautiful, dreamy background that makes the subject stand out. This is where Understanding the Role of Aperture becomes crucial. Aperture refers to the size of the opening in your camera lens through which light enters. It not only determines how much light reaches the camera sensor but also influences an important aspect called depth of field (DOF). DOF refers to the range of distance within an image that appears acceptably sharp.
To better understand this concept, consider a hypothetical scenario: you are taking a close-up shot of a flower blooming in a garden with various elements at different distances from it. By adjusting the aperture settings on your camera, you can control whether everything in the scene appears sharply focused or if certain areas become soft and blurred while keeping the main subject crisp.
Here are some key points about aperture and its impact on depth of field:
- Aperture Size: A wider aperture (represented by smaller f-stop numbers) such as f/1.8 allows more light to enter and creates shallow DOF, resulting in a blurred background known as bokeh.
- Subject Distance: The closer your subject is to the camera, the shallower will be the DOF even at higher f-stop values.
- Lens Focal Length: Longer focal length lenses tend to have narrower angles of view and produce shallower DOF compared to shorter focal lengths.
- Image Sensor Size: Cameras with larger sensors generally provide greater control over DOF than those with smaller sensors when using similar aperture settings.
| Wide Aperture (e.g., f/2.8) | Narrow Aperture (e.g., f/16) | |
|---|---|---|
| Effect | Creates shallow DOF with selective focus | Results in deep focus with most of the scene in focus |
| Usage | Ideal for portraits, macro photography, and bokeh | Suitable for landscapes and group photos |
| Example | Blurred background emphasizing a single subject | Sharp details throughout the image |
| Impact | Adds a sense of depth and isolates subjects | Provides more overall sharpness |
Understanding how aperture affects DOF empowers photographers to make creative choices when composing their images. In the subsequent section, we will explore another fascinating aspect of photography: the artistic effect of bokeh in photographs.
Exploring the artistic effect of bokeh in photographs
Transitioning from the role of f-stop in determining light, let us now delve into the captivating world of bokeh – a term that refers to the aesthetic quality of out-of-focus areas in a photograph. Bokeh has become an increasingly popular technique among photographers due to its ability to create visually stunning images. To illustrate this concept, imagine capturing a portrait against a scenic background where beautiful lights twinkle like stars, while the subject remains sharp and distinct. This delightful interplay between focused and blurred elements not only adds depth but also evokes an emotional response from viewers.
When it comes to creating bokeh, understanding certain factors is crucial:
- Aperture Setting: Wider apertures (lower f-numbers) such as f/1.8 or f/2.8 produce shallower depths of field, resulting in enhanced bokeh effects.
- Distance: The closer the subject is to the camera compared to the background, the more pronounced the bokeh effect becomes.
- Lens Characteristics: Different lenses have varying characteristics when it comes to rendering bokeh. Certain lenses are renowned for producing smooth and pleasing bokeh, while others may result in harsher or busier backgrounds.
- Light Sources: The shape and intensity of light sources within the frame contribute significantly to shaping the appearance of bokeh.
To further understand how these variables impact bokeh aesthetics, consider Table 1 below:
Table 1: Impact of Different Factors on Bokeh Aesthetics
| Factor | Impact on Bokeh Aesthetics |
|---|---|
| Aperture Setting | Wider aperture results in stronger |
| blur and larger circles | |
| Distance | Closer distance yields more prominent |
| blur with softer edges | |
| Lens Characteristics | Certain lenses offer smoother |
| bokeh with less distortion | |
| Light Sources | Bright lights create more pronounced |
| and eye-catching bokeh effects |
By manipulating these factors, photographers can achieve a wide range of creative possibilities. Experimenting with different combinations allows for the creation of unique visual experiences that captivate viewers’ attention and evoke specific emotions. Ultimately, mastering the art of utilizing aperture to enhance composition will enable photographers to push their creative boundaries even further.
With an understanding of how bokeh impacts photography, we now turn our focus towards mastering the use of aperture for creative composition.
Mastering the use of aperture for creative composition
Exploring the artistic effect of bokeh in photographs has provided photographers with a powerful tool for creative expression. By intentionally blurring the background while keeping the subject sharp, photographers can draw attention to their intended focal point and create visually stunning images. However, mastering the use of aperture goes beyond just creating pleasing bokeh; it is also crucial for achieving compelling compositions.
To illustrate this point, let’s consider a hypothetical scenario where a photographer wants to capture an intimate portrait of a musician on stage during a live performance. By using a wide aperture setting, such as f/1.8 or lower, the photographer can isolate the musician from the busy background cluttered with instruments and equipment. The resulting shallow depth of field allows viewers to focus solely on the artist’s emotions and expressions, evoking a sense of connection and intimacy.
When it comes to utilizing aperture creatively for composition purposes, there are several key considerations:
- Subject-background separation: A wide aperture can help separate your subject from its surroundings by creating a blurred background. This visual distinction directs viewers’ attention straight to your main subject.
- Depth perception: Aperture plays a significant role in controlling depth perception within an image. By adjusting your aperture settings accordingly, you can influence how much of the scene appears in sharp focus versus being out of focus.
- Lens characteristics: Different lenses possess varying maximum apertures and produce distinct rendering effects. Understanding these characteristics enables photographers to choose lenses that best suit their desired aesthetic outcome.
- Light sensitivity: Wider apertures allow more light into the camera sensor, making them ideal for low-light conditions or situations where fast shutter speeds are required.
Embracing these considerations not only enhances technical proficiency but also serves as stepping stones towards capturing captivating imagery through careful manipulation of aperture settings. In our next section about “Tips for achieving a shallow depth of field,” we will delve deeper into practical techniques that enable photographers to achieve remarkable results when working with wide apertures.
Tips for achieving a shallow depth of field
As we delve deeper into understanding aperture, it is crucial to explore its direct impact on depth of field (DOF). Imagine a photographer capturing a portrait against a scenic backdrop. By employing a wide aperture setting, such as f/1.8 or f/2.8, they can achieve a shallow DOF, which beautifully isolates the subject from the background and directs viewers’ attention solely onto them.
To fully grasp how aperture affects DOF, consider the following key aspects:
- Aperture Size: The size of the aperture directly influences DOF. A wider aperture (smaller f-number) results in shallower DOF, allowing for selective focus and creating a sense of depth within an image.
- Distance to Subject: The proximity between the subject and the camera also plays a role in determining DOF. When shooting at close range with a wide aperture, even slight movements can significantly alter what remains in sharp focus.
- Focal Length: Longer focal lengths tend to compress space, resulting in reduced DOF compared to shorter focal lengths when using similar apertures.
- Sensor Size: Cameras with larger sensors typically offer more control over DOF due to their ability to capture more light and produce images with greater detail.
Consider this table that illustrates how different combinations of aperture settings and distances affect depth of field:
| Aperture | Distance from Subject | Resulting Depth of Field |
|---|---|---|
| f/2 | 5 feet | Shallow |
| f/8 | 10 feet | Moderate |
| f/16 | 20 feet | Deep |
By manipulating these variables effectively, photographers have the power to create captivating compositions that draw viewers’ eyes exactly where intended.
Transitioning seamlessly into the subsequent section about “Utilizing the exposure triangle to capture well-balanced photos,” we will now explore how aperture works in conjunction with other essential elements of photography. Understanding this relationship is crucial for achieving technically proficient and aesthetically pleasing images.
Utilizing the exposure triangle to capture well-balanced photos
Building upon the knowledge of achieving a shallow depth of field, our exploration now delves into another essential aspect of photography – utilizing the exposure triangle to capture well-balanced photos. By understanding and effectively manipulating aperture, shutter speed, and ISO, photographers can unleash their creativity while maintaining technical precision.
Example: Consider a scenario where a photographer wishes to photograph a moving subject in low light conditions. To freeze the action without introducing excessive noise, they must find the optimal balance between all three elements of the exposure triangle.
Aperture plays a crucial role in determining not only how much light enters the camera but also the depth of field. It refers to the opening within the lens that controls this light flow. The following are key points to consider when working with aperture:
- Aperture is measured in f-stops (e.g., f/1.8, f/4, f/11), which represent different levels of openness.
- A smaller f-stop number corresponds to a larger aperture size and vice versa.
- Wide apertures create a shallower depth of field, allowing for selective focus on specific subjects or blurring out distracting backgrounds.
- Narrow apertures result in greater depth of field, ensuring more elements throughout the frame remain sharp.
To better grasp these concepts, let’s explore an example table showcasing various f-stop settings alongside their corresponding visual effects:
| F-Stop Setting | Depth of Field | Visual Effect |
|---|---|---|
| f/1.8 | Shallow | Background blur creates bokeh effect |
| f/5.6 | Moderate | Balanced focus between subject and background |
| f/16 | Deep | Most elements from foreground to background appear sharp |
Incorporating such diverse f-stop settings allows photographers to experiment with different styles and express their artistic vision accordingly. Whether capturing portraits with creamy bokeh or landscape images with exceptional depth, the aperture setting enables photographers to create compelling compositions.
With a solid understanding of the exposure triangle and how aperture influences photographs, our next section will explore the importance of experimenting with different f-stop settings for diverse photography styles. By embracing various aperture values, photographers can truly harness their creativity and produce captivating images that resonate with viewers on a deeper level.
Experimenting with different f-stop settings for diverse photography styles
Imagine capturing a breathtaking landscape photograph of a cascading waterfall. To freeze the motion and capture every droplet of water, you need to understand the role of shutter speed in photography. Shutter speed refers to the amount of time that your camera’s shutter remains open, allowing light to enter and create an image.
When it comes to controlling shutter speed, there are several factors to consider:
-
Motion Blur: A longer exposure time will introduce motion blur into your images, which can be used creatively to convey movement or add a sense of dynamism. On the other hand, using faster shutter speeds can help freeze fast-moving subjects such as sports events or wildlife action shots.
-
Low Light Conditions: In situations with limited available light, slower shutter speeds may be necessary for proper exposure. However, this also increases the risk of unwanted camera shake resulting in blurry photos. Utilizing a tripod or stabilizing equipment becomes crucial when working with slow shutter speeds.
-
Creative Effects: Experimenting with long exposures opens up opportunities for unique creative effects like light trails from passing cars at night or smooth waterscapes where waves appear misty and dreamlike.
-
Subject Focus: The chosen shutter speed impacts how sharp your subject appears in relation to its surroundings. High-speed photography requires quick exposures to capture fast-moving objects sharply without blurring them due to their own motion.
| Shutter Speed | Outcome |
|---|---|
| 1/1000 sec | Freezing fast-moving subjects |
| 1/250 sec | Capturing general daily actions |
| 1/30 sec | Introducing mild motion blur |
| 5 seconds | Creating dramatic light trails |
By mastering various techniques associated with manipulating shutter speed, photographers can effectively capture compelling images that tell stories through motion and stillness.
Creating captivating images with bokeh as a focal point
Bokeh refers to the aesthetic quality of the out-of-focus areas in an image, often characterized by soft and pleasing blur. By strategically utilizing bokeh, photographers can draw attention to their subject while adding depth and visual interest to their compositions.
Example: Imagine capturing a portrait against a busy cityscape at night. With careful manipulation of aperture settings, you can achieve a stunning effect where the lights in the background transform into beautiful orbs of color, creating an enchanting backdrop that enhances the overall mood and impact of the photograph.
To fully harness the potential of bokeh in your photography, consider these key points:
- Lens Selection: Certain lenses are more adept at producing pronounced bokeh due to factors like lens construction and maximum aperture size. Experimenting with different lenses will allow you to find one that best suits your desired style.
- Aperture Choice: Widening your aperture (using lower f-stop values) increases the amount of bokeh produced in an image. Conversely, using smaller apertures (higher f-stop values) will result in less prominent bokeh but greater depth of field.
- Subject Distance: The distance between your camera and subject plays a crucial role in achieving desirable bokeh effects. Shooting subjects closer to your lens with a wider aperture setting tends to yield more pronounced blurred backgrounds.
- Background Elements: Selecting visually appealing or contrasting elements for your background can enhance the impact of your bokeh. Experiment with various textures and colors to achieve unique results.
| Tips for Captivating Bokeh Photography | |
|---|---|
| 1. | Choose prime lenses for better control over depth of field |
| 2. | Utilize wide apertures (e.g., f/1.4 – f/2.8) for pronounced bokeh |
| 3. | Experiment with different distances between subject and camera |
| 4. | Pay attention to the background, selecting visually intriguing elements |
Incorporating these considerations into your photography will allow you to create captivating images that feature bokeh as a focal point. By skillfully manipulating aperture settings, lens selection, subject distance, and background elements, you can harness the power of bokeh to elevate the visual impact of your compositions. Unleash your creativity by exploring various techniques and discovering new ways to make your subjects stand out amidst enchanting backgrounds.